Adding A-Star (Graph) to our Project
A bit of Theory
We can break the rout to linear segments, and use ends of these segments as nodes in a-star algorithm. That means we can find a route from A to B (as list of nodes) and use straight line path planner to connect these nodes.
This graph was created in map_editor utility (see section above), let's repeat it here:
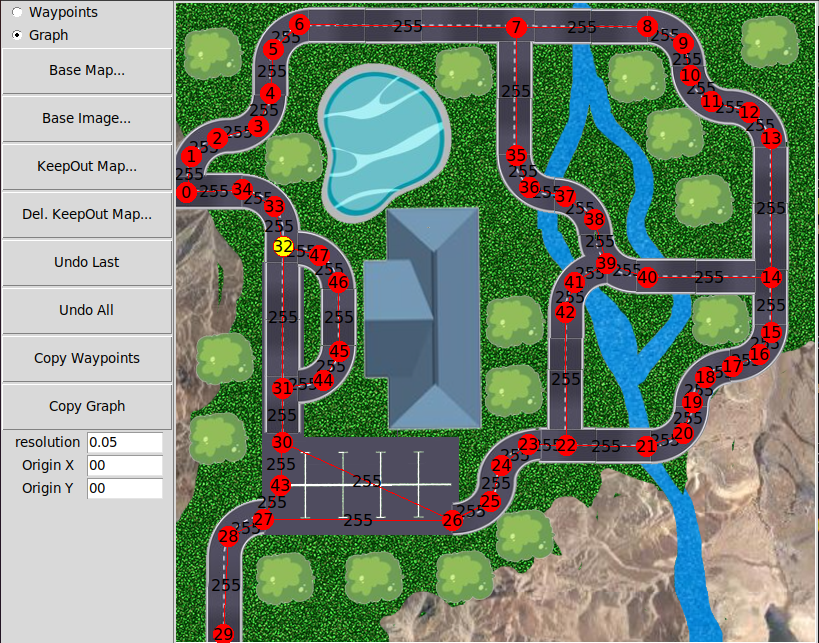
When we need to create a path, we use these nodes numbers to set the destination for a bot.
Here is, however, a problem: the a-star algorithm doesn't know where the bot is! It can be on any node, or outside, in an "uncharted" territory. This problem, by the way, is common for all navigation programs, one of solutions is the last (well, in our case, first) mile navigation. In other words, we figure out where the bot is, and create a straight line (or some other, if we have this algorithm handy) path to a closest (not first in the list!) node of a graph. So, if the task is to go from A to B, and robot is close to C, we need to drive robot to C, and then to create path C-A-B.
This is not necessarily a good strategy, as closest point might ba an isolated one, so the path will fail. We will use this approach for now. In future, maybe, we'll allow the user to say "drive to D instead of driving to closest point, and then to A and B"
New world and maps
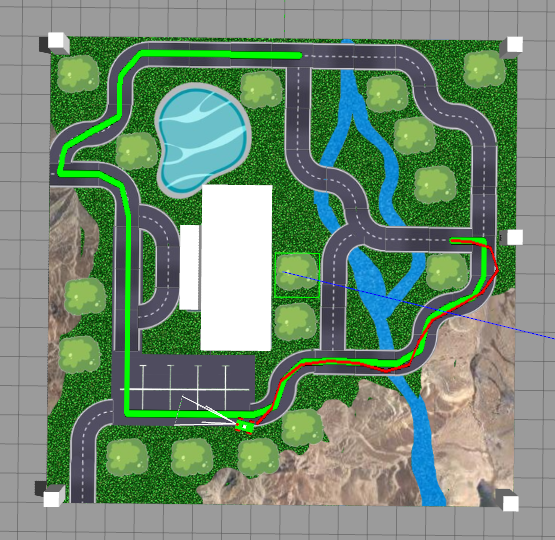
To start with, we need a new world: we have a nice background picture, but it doesn't align with "maze" we used before. So we switch to world_01.sdf world.

Notice that I have placed couple of objects on top of a background image. The reason is, AMCL localization algorithm uses lidar scan data, so we need to provide something lidar can see.
Of course, these objects are located on top of their icons on the background image:

How can we find the right coordinates (of the center of corresponding shape) that we write into the .sdf file? We open map_editor utility (see section above) and choose Keepout and "pipette" tool. Now we can load the base image, and when we click on it, the click coordinates, both screen and world (in pixels and meters, accordingly) are printed in the terminal you used to start the Utility:
The (0, 0, 0, 0) is for pixel color.
Now, to see it properly in RViz, we need to provide RViz with proper map and keepout map. I have created files called world_01.yaml and world_01.pgm, located in maps directory.
To create these files, I have opened map_editor utility, loaded the base image, switched to Keepout mode and drew the keepout map on top of a base image, using brush tool.
This is not a very accurate image, but it will do. You can improve it in some bitmap editor, like Gimp, or wait until I implement more drawing tools in map_editor utility.
Then I have saved the keepout map. As for map, I have copied the keepout map and... that's all. We can actually use same file as map and keepout map. Here is an example of starting the app. As you can see, for both map and keepout map I use world_01.yaml. This is a temporary solution, just because graph algorithm does not use keepout map. In the section below, for a-star grid (as opposed to graph) navigation I am goind to create a different keepout map. But currently, they are the same: map and keepout mask:
Now AMCL can figure out where the robot is.
Coordinator.py
This is a script that manages all activity of our application. Here we set the task (list of nodes) and so on. In other words, nothing new, compared to what you saw in Straight Line Planner section.
GlobalPlannerAStar.py
This is a planner that uses a-star graph algorithm. It is derived from AStarGraph class (see earlier sections). Now, it DEFINITELY has to be also derived from GlobalPlannerStraightLine class, as it uses straight line functions. I will do it later.
PathFollower.py
The path follower file didn't change at all, compared to earlier section.