Robotic Spider: Software
Arduino IDE
I am going to use NodeMCU processor that can be programmed from Arduino IDE. I am not going to explain its installation here, as it is very well documented online. Also, you can take a look at "robotic hardware" sections of this site.
The overall idea is to install Arduino IDE (currently, it is v.2). It comes with some libraries, for example, when you use
... you do not have to load any additional packages. However, some libraries are not installed by default, so you will have to install them; the procedure is simple and well documented. However... You should always keep in mind security considerations. For example, let's say I want to use WiFi library:
If you follow the standard procedure, you will find that there are few libraries with that name, and who knows what troyans they contain. For you (and myself in future) to get a correct library, I have included the direct link: you will have to download the zip file from GIT and use Arduino IDE to "add library as Zip":
Controlling solenoids
In this article, the spider doesn't use solenoids. Nevertheless, let's provide a simple script for controlling them so the section is complete.
Solenoid is a rather simple device: it cas coil and a metal rod; when coil has current, rod is pulled into it. When not powered, a spring pushes the rod outside.
So we use a transistor that takes small signal from processor's pins and amplifies it for solenoid to use, that's all. Here is the code for solenoid.ino (included in the archive). It uses all solenoids, to turn them on and then off, in cycle. It also turns on and off the NodeMCU on-board LED:
Controlling servo motors: basics
An out-of-the-box servo functionality is based on pulse wide modulation: you send pulse of certain frequency, the motor turns to a certain angle. So, let's say we want our horizontal servo motor to turn within certain range ("certain", because I don't want a full range, after all, it is a spider, not a propeller).
Controlling servo motors: smooth way
As I mentioned in introduction, this approach has a huge problem: motor moves as fast as it can, which makes our spider look jerky. To fix it, we can use the following approach: having motor's current position and a goal position, break the interval to, say, 40 steps, and move motor one step in a time with certain delays between steps.
This approach works fine on a simgle motor, but if we have any other code to run (like another motor), we have a problem: it is blocking. And ESP8266 that is a processor in NodeMCU I use, doesn't really support multithreading.
But Arduino-style code has loop() function, so nothing prevents us from handling steps of the motors ourselves. This is what the following code is about.
It uses the following logic: create multiple queues, and at each step, make one queue control one motor, until queue is empty. For example, let's say queue number 3 at this moment controls motor 1. It has number currnt_pulse equal 300, end_pulse equal 400 and step equal 10. In a loop, we send "300" to a motor, so it turns. Then we add step to current pulse (it becomes 310) and do the same for all queues (and it means for all motors). And so on, until currnt_pulse becomes equal end_pulse.
Before we proceed to the code, here is an additional thing to keep in mind. Queue number 5 does not necessarily serve motor number 5. Actually, it is a nice way to handle sequential vs parallel motor movements. if we place commands for two different motors in two different queues, they will run parallel. If we put them to the same queue, the first motor runs first, and only then the second motor runs.
However, here is the catch. For the algorithm i just described to work, we need to know the current motor position. And... we don't. Standard servo library doesn't have "get position" function. This is why every time before we start, I have to move all motors to one of known positions in a fast way - at that moment we know the current position and "smooth" algorithm can work.
The code below is heavily commentsd, plus i have examples for all major cases.
Remote control: WiFi
Now our robot is able to perform "move forward" and "turn" commands, but commands are hardcoded (see "spider" Arduino project that is included in the archive). As NodeMCU has an on-board WiFi module, let's use it to control out robot remotely.
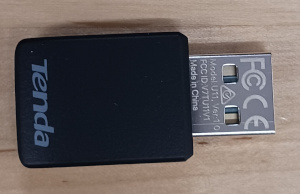
As for PC... I use PC tower and not notebook or, say, Android phone, so I have to somehow make my PC WiFi awayr. I used USB adapter, if you do the same, make sure it works at 2.4 GHz, as this is what NodeMCU requires:
The idea is to move the code sections of spider.ino project that is responsible for moving forward or turning, into separate functions and call these functions when corresponding commands are received over WiFi. When you start the spider, it will show up as a WiFi network as it provides server. In Ubuntu, go to list of available WiFi networks and connect to SpiderBot_AP (this network name and the password are hardcoded in a code below).
Do you have to do it every time? No. To enable WiFi autoconnect to PC when robot comes online, run terminal command:
nmcli connection modify SpiderBot_AP connection.autoconnect yes
Here is a modified Arduino project (spider_wifi.ino), heavily commented. The code is based on spider.ino from the previous chapter of this tutorial. It is important: same tests as in spider.ino can be ran on spider_wifi.ino, so it is not a different code, but the code you saw above with WiFi functionality added to it. For the same reason, I am not going to comment the servo related code below: it didn't change.
Remote control: Code to run on PC
On PC, I am going to run Python code to send commands to spider robot, over WiFi. Below is a simple terminal based script:
Now let's use the TkInter Pyton library to create a true remote control program, one with buttons! Here is the code:
Here is the result: